Note, for purposes of staking, a Crypto.com App is not a necessary requirement. We are emphasizing the utility of the Crypto.com DeFi Wallet for the transfer of funds to the network out of one of many options for funding a Crypto Wallet.
The Crypto.com series of apps have the best workflows and ease of use for their blockchain. Therefore use of the Crypto.com series of apps are recommended and optimized for interacting with the blockchain.
If you do plan to use a Crypto.com App, the sign up process takes roughly 24 - 48 hours for setup of a user account along with approvals.
¶ Crypto.com DeFi wallet installation
Installing the Crypto.com DeFi Wallet
As of this tutorial, the Crypto.com DEFI Wallet is mostly available using a smartphone for users based in the US. For purposes of this tutorial we will be using an Android based smartphone. However the steps used for an Android device will be very similar to those used for Apple iOS.
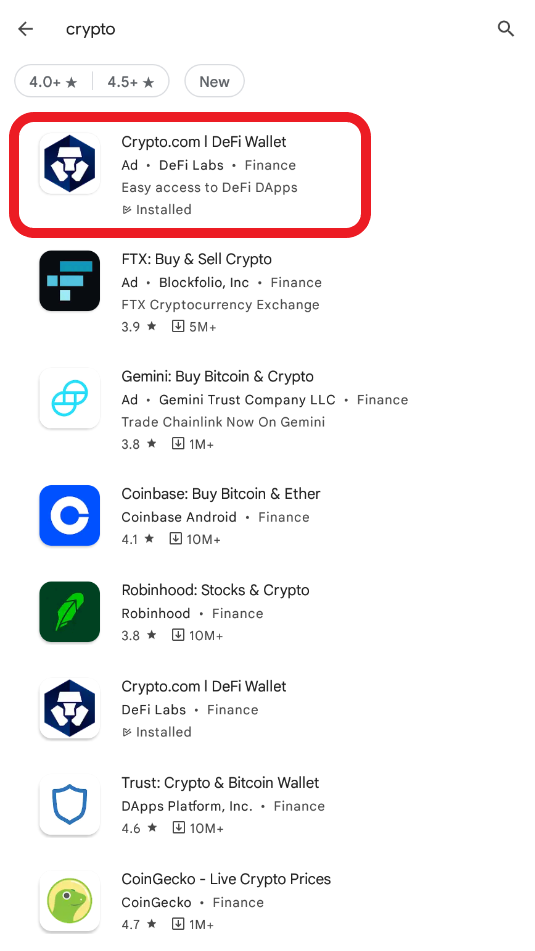
Step 1. In the play store, search for the term ”crypto” and select the highlighted app.
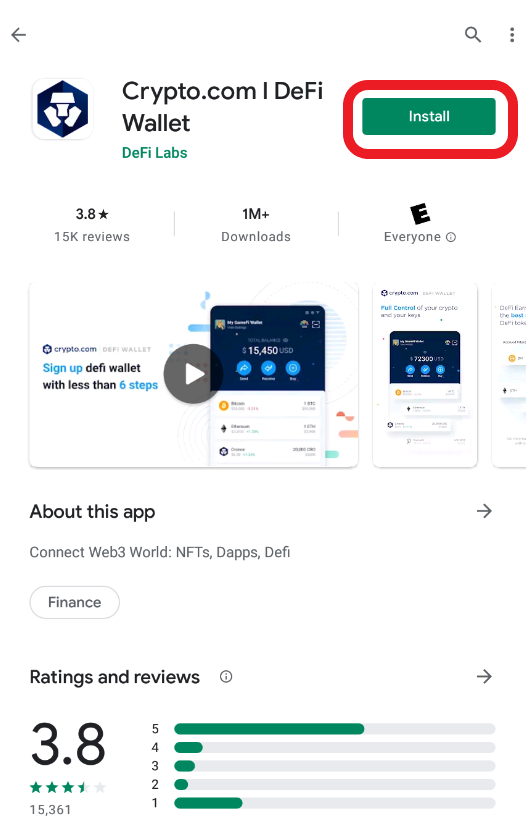
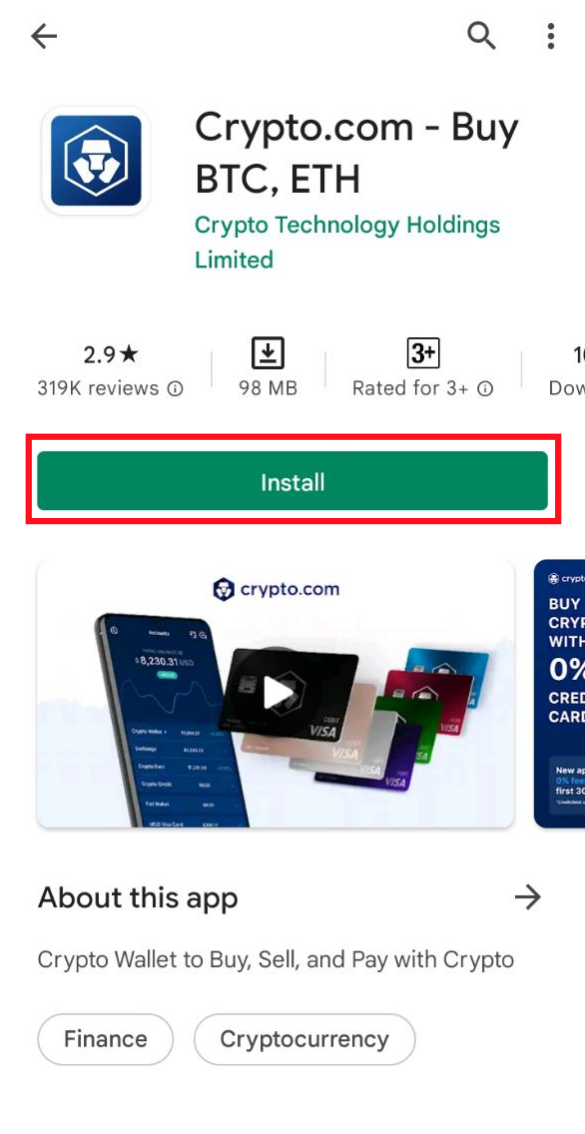
Step 2. Install the app by tapping the “Install” button.
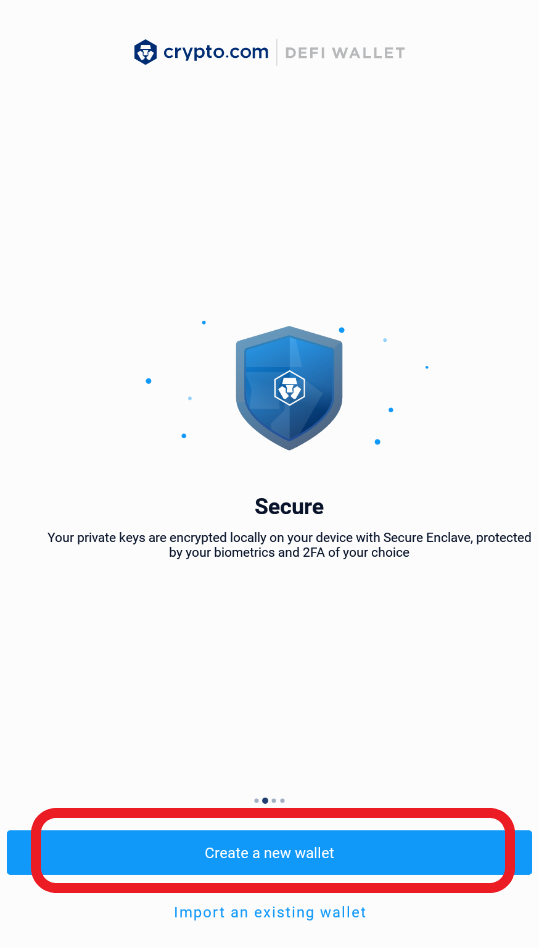
Step 3. Open the crypto.com app and tap the “Create a new wallet” button.
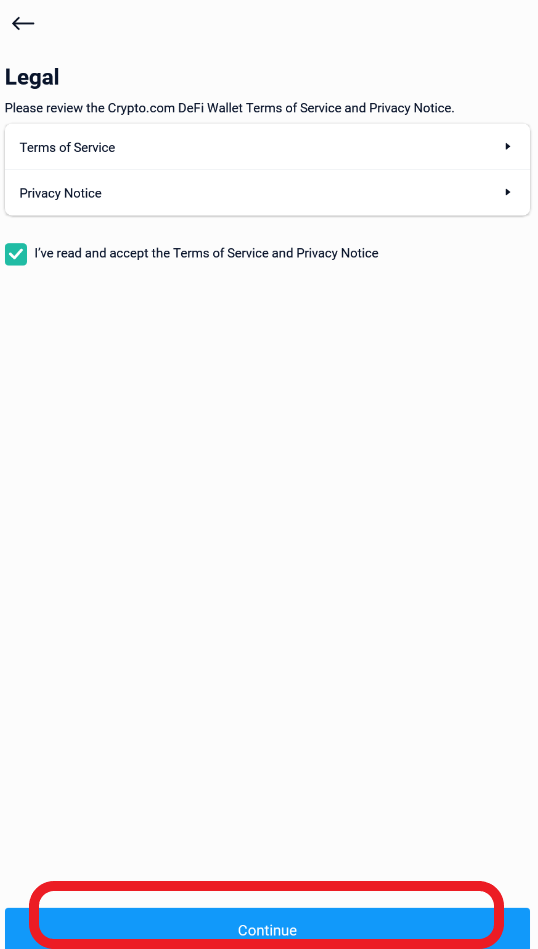
Step 4. Accept the terms of service and tap the “Continue” button.
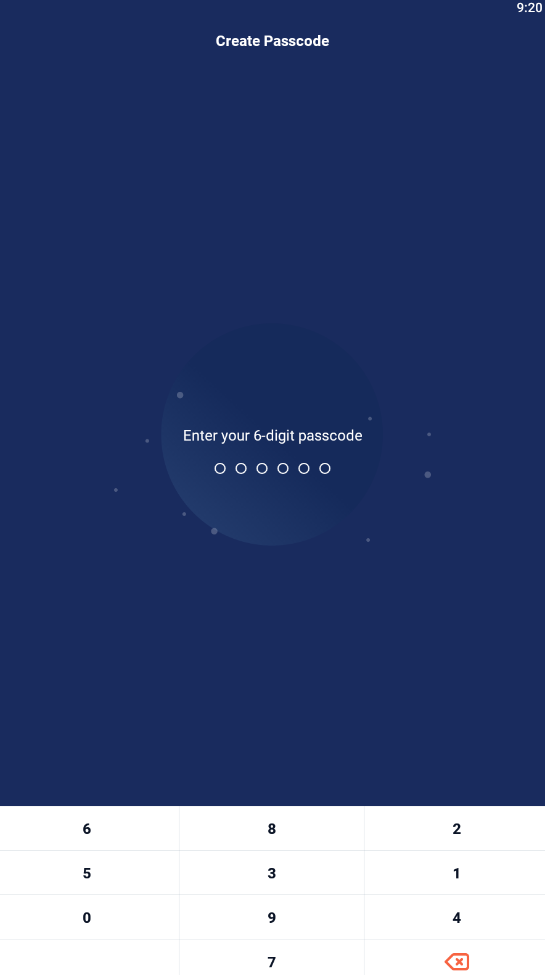
Step 5. Enter a 6 digit passcode when prompted.
Step 6. The app will ask you to confirm your 6 digit passcode and back to the main screen.
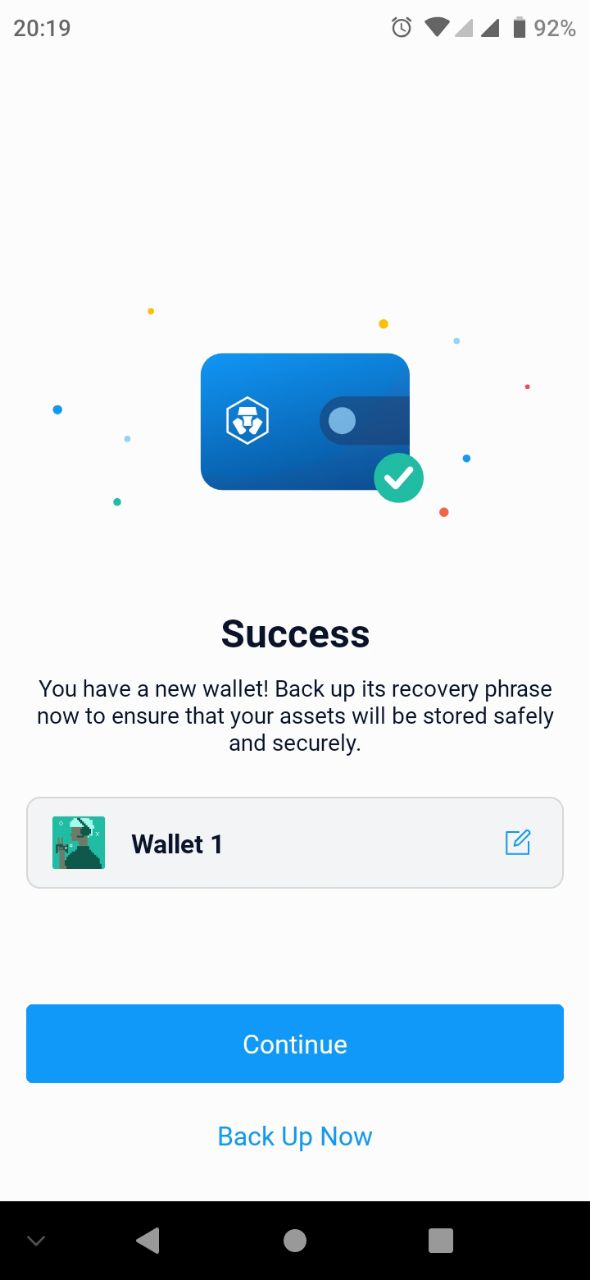
Step 7. Your new crypto.com wallet should now be set up.
Step 8. Generate a recovery phrase for your Crypto.com App
Anyone can use this phrase to access and control your wallet, so it is critical that you keep this phrase secret and never lose it. Many suggest that you should write this phrase down or secure it in some way for later use, as you will likely need it again.
Click the “Back up now” button.
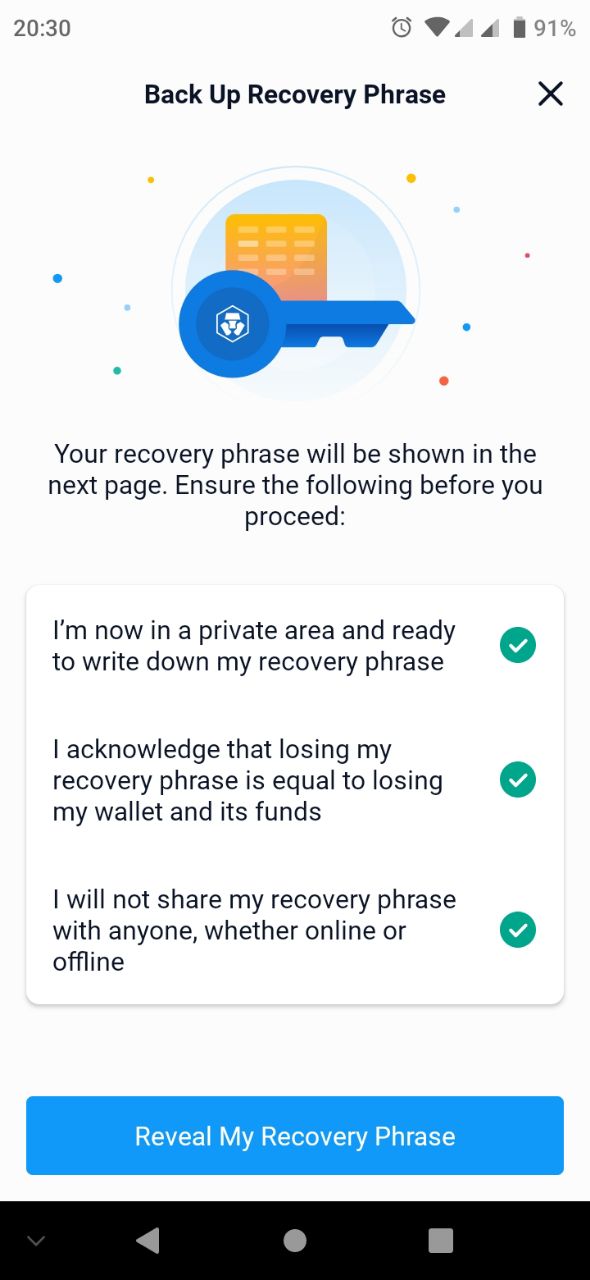
Step 9. Tap the “Reveal my recovery phrase” button.
You will see the first word of your recovery phrase.
Write this word down, and select the right arrow next to the word.
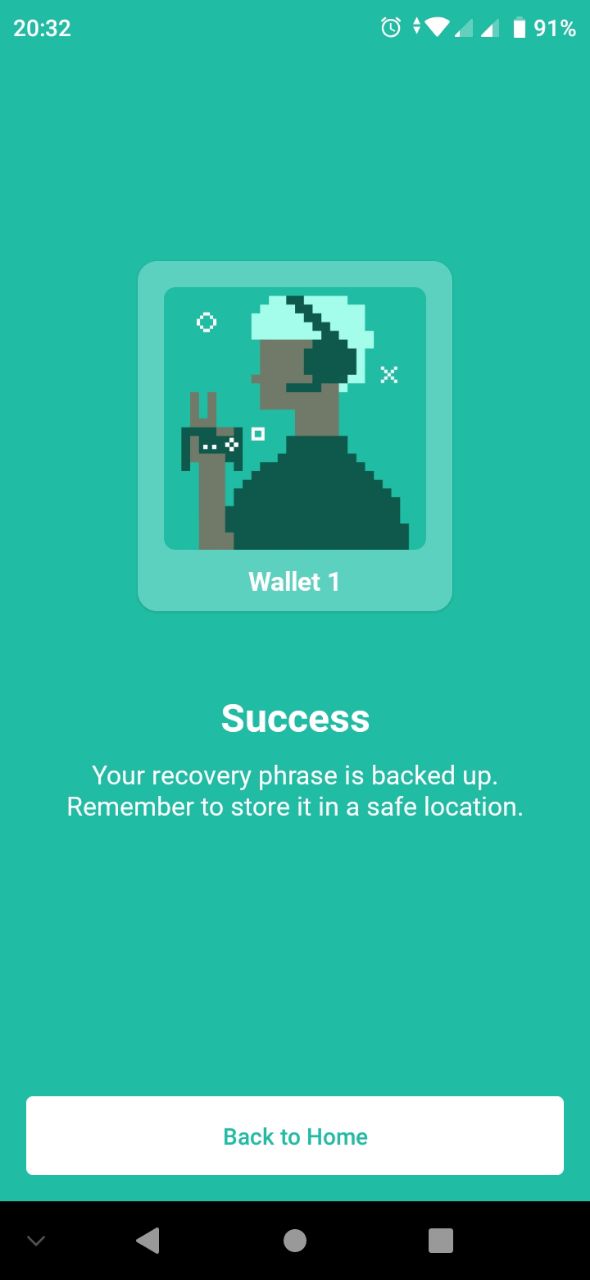
Once you have gotten to the last word, and have confirmed that you have written down all the words in a secure location, tap the “Continue” button.
Step 10. Enter the correct words of your recovery phrase, and tap the “Continue” button.
Step 11. Click the “Back to home” button.
¶ CRYPTO.COM APP installation
Step 1. Open the play store and find Crypto.com App on the phone.
Step 2. Open app.
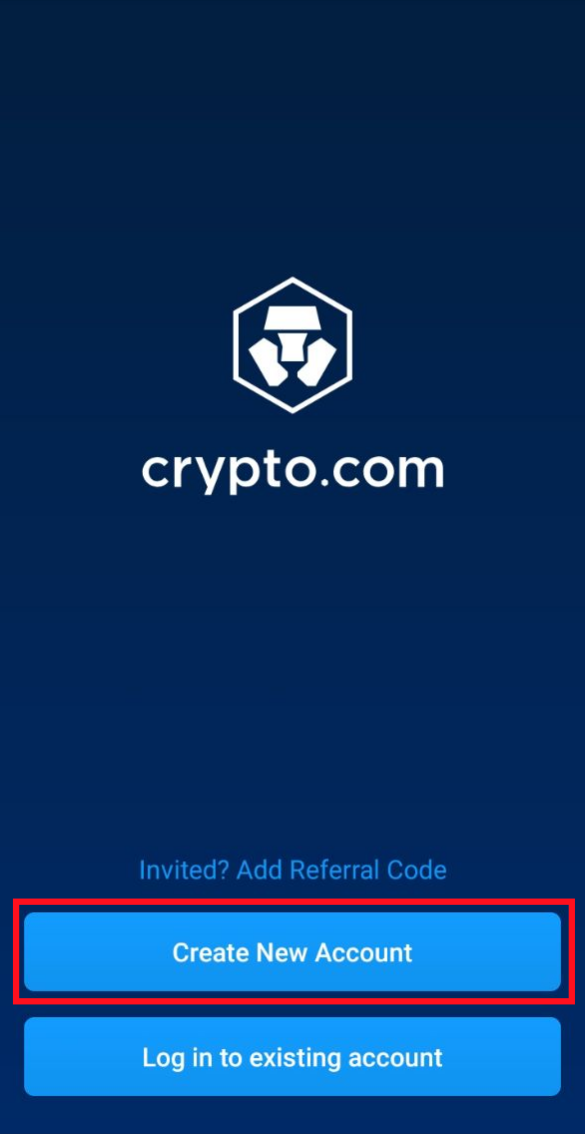
Step 3. Tap the “Create New Account” button.
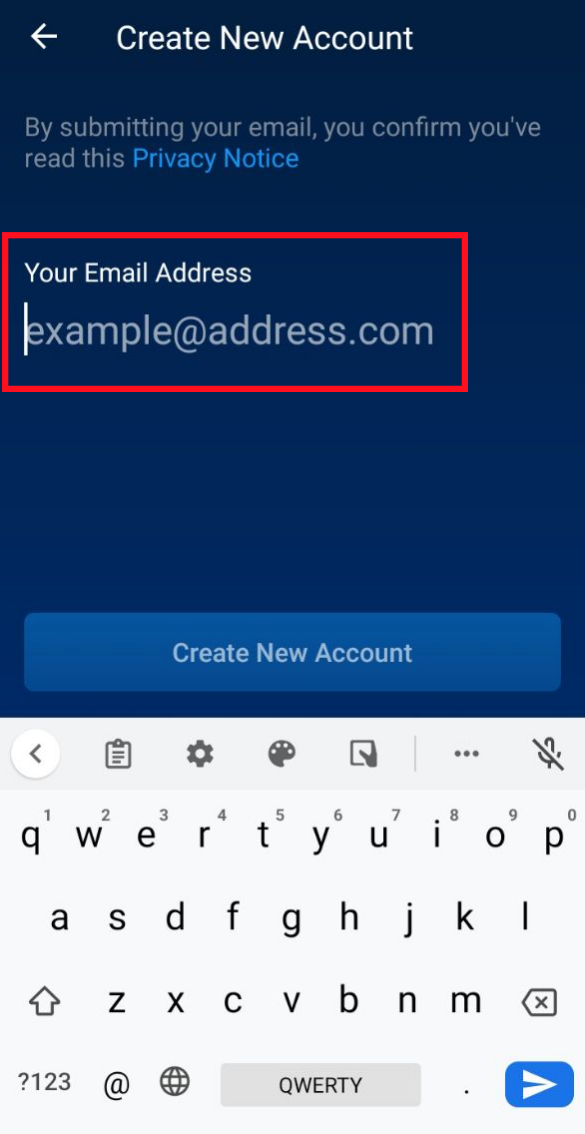
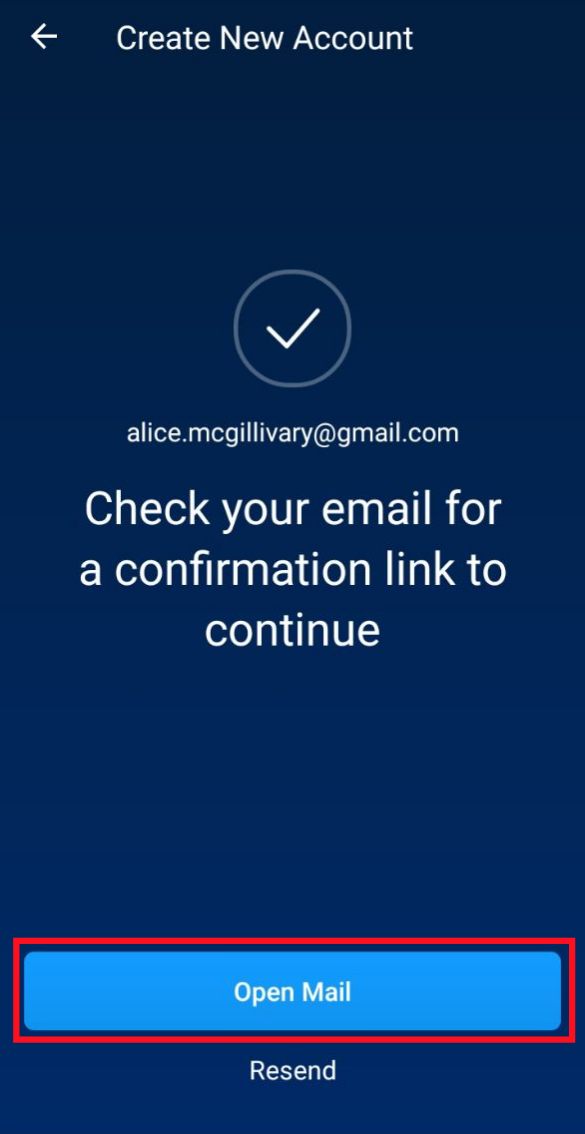
Step 4. Enter your email address and click the “Create New Account” button.
Step 5. Submit your email.
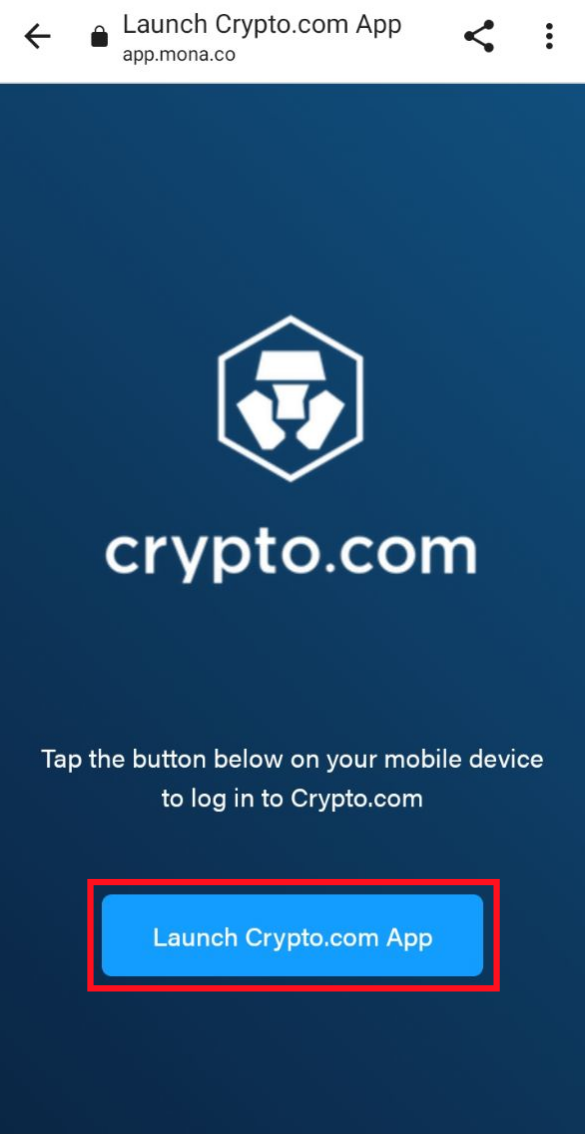
Step 6. Tap the “Launch Crypto.com App'' button. Read and accept the Terms&Conditions and Privacy Notice. And then tap the “Create New Account'' button.
Step 7. Enter your phone number and tap the “Send Verification Code” button. Confirm your phone number.

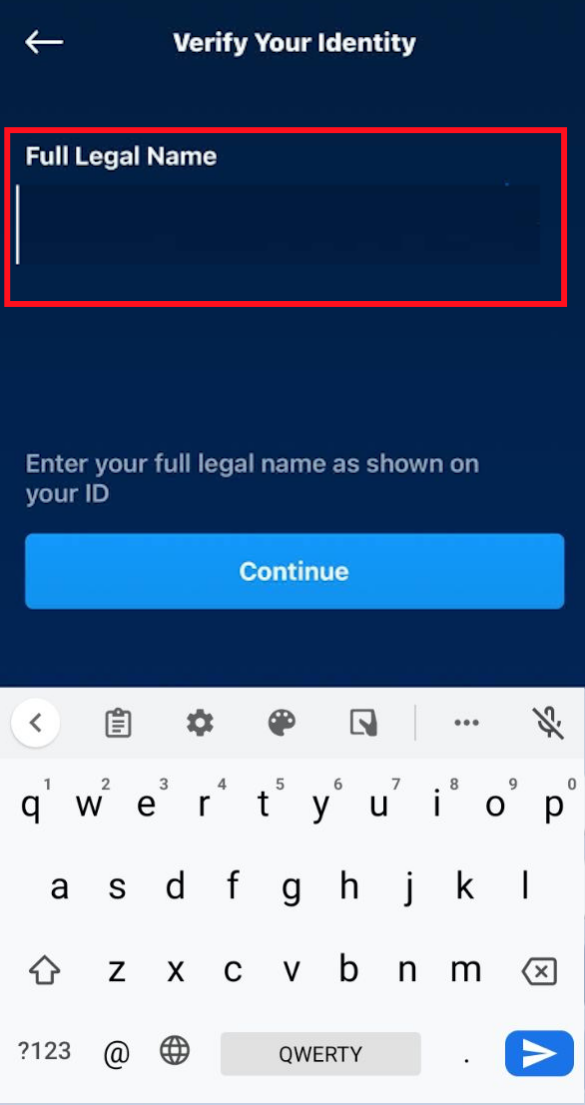
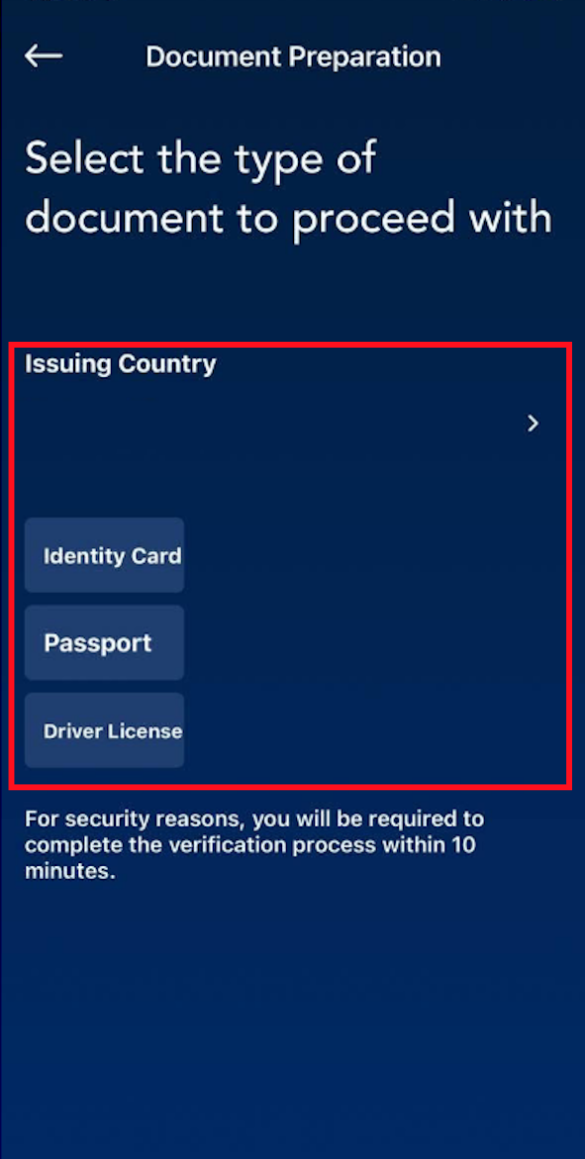
Step 8. You need to enter full legal name, scan ID and take a selfie on the next steps. Tap the “Continue” button. During the 24 hours Crypto.com will notify you.
Step 9. Set a password and select your payment currency.
Step 10. Verification is completed.
¶ Connect CRYPTO.COM wallet to CRYPTO.COM APP
Step 1. Open Crypto.com DeFi wallet on the phone.
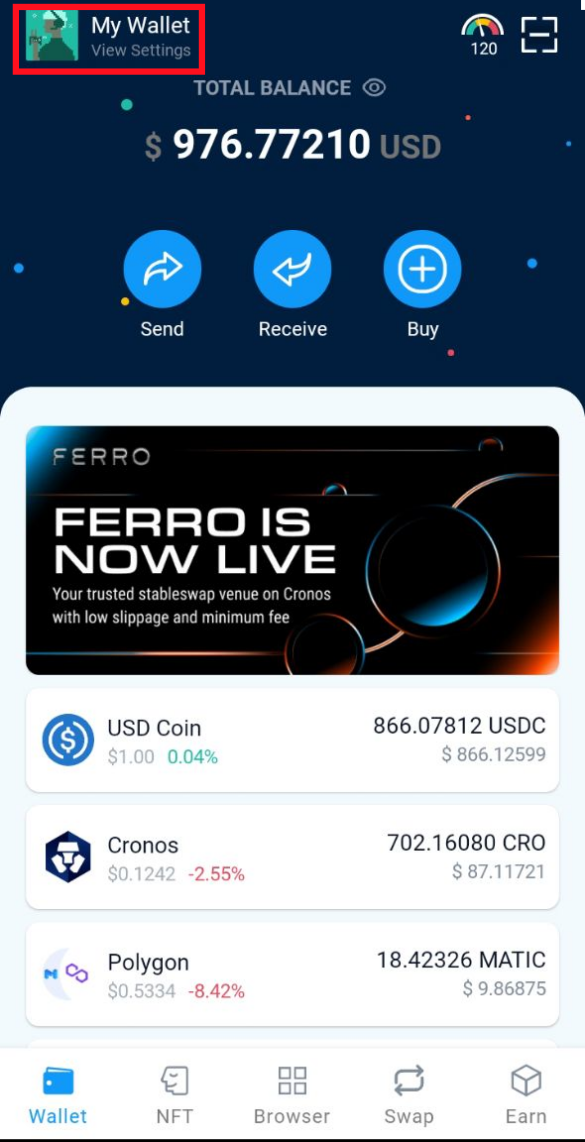
Step 2. Tap the icon on the left top corner of the screen.
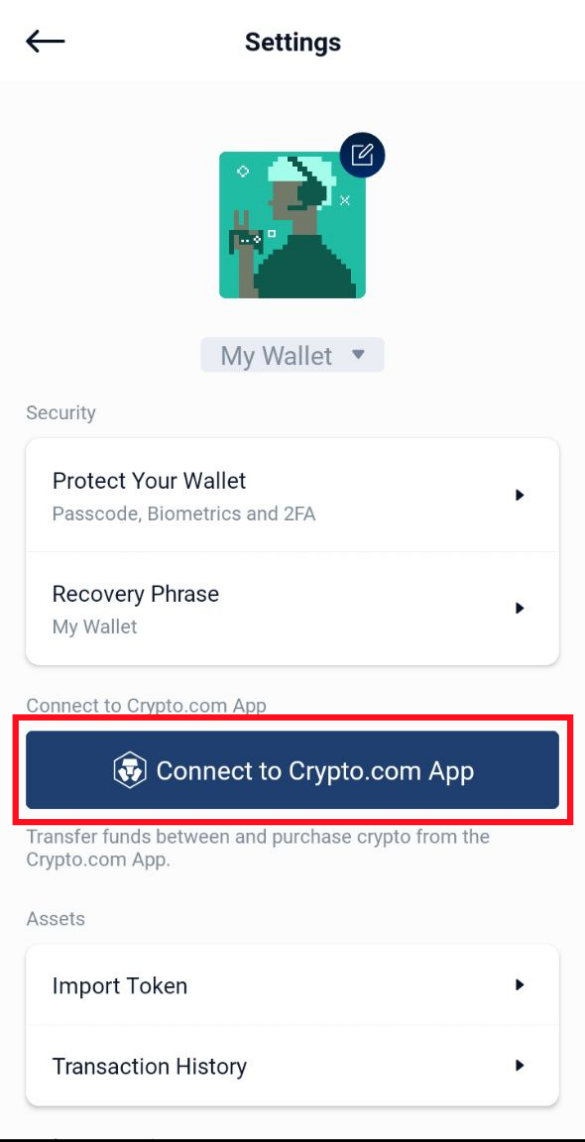
Step 3. Connect the Wallet to your Crypto.com App by tapping the “Connect to Crypto.com App” button.
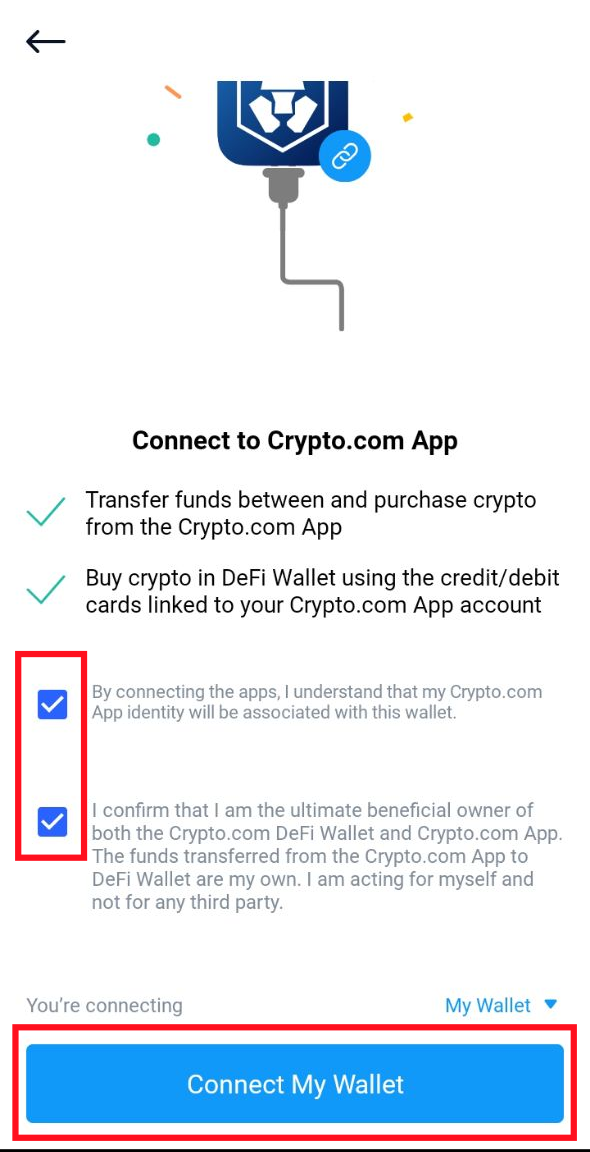
Step 4. Mark checkboxes and tap the “Connect My Wallet” button.
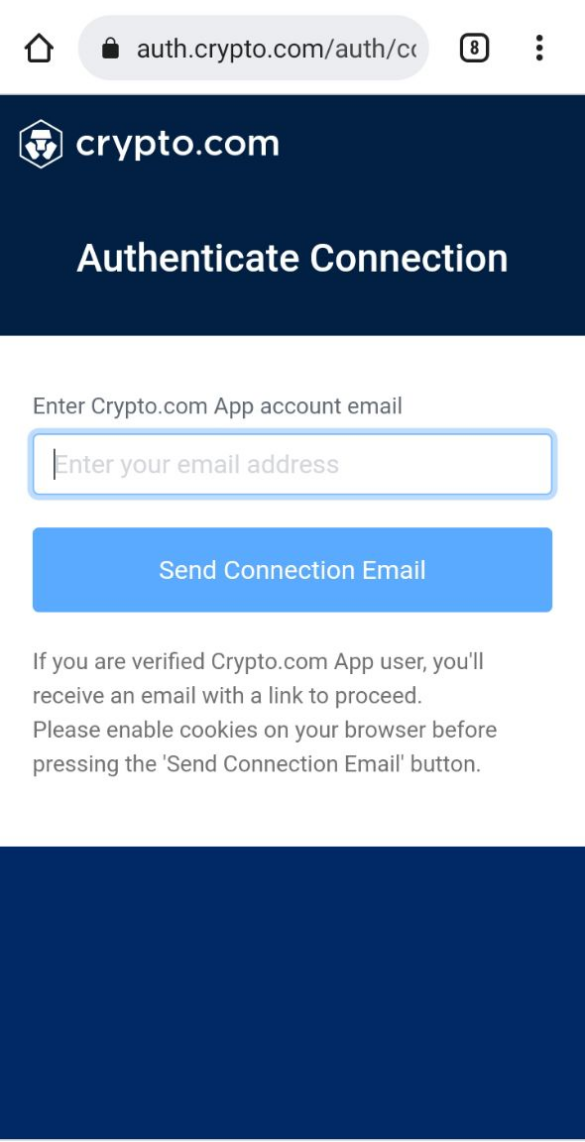
Step 5. Enter email and tap the “Send Connection Email” button. You will receive an email with instructions on how to proceed with connection.
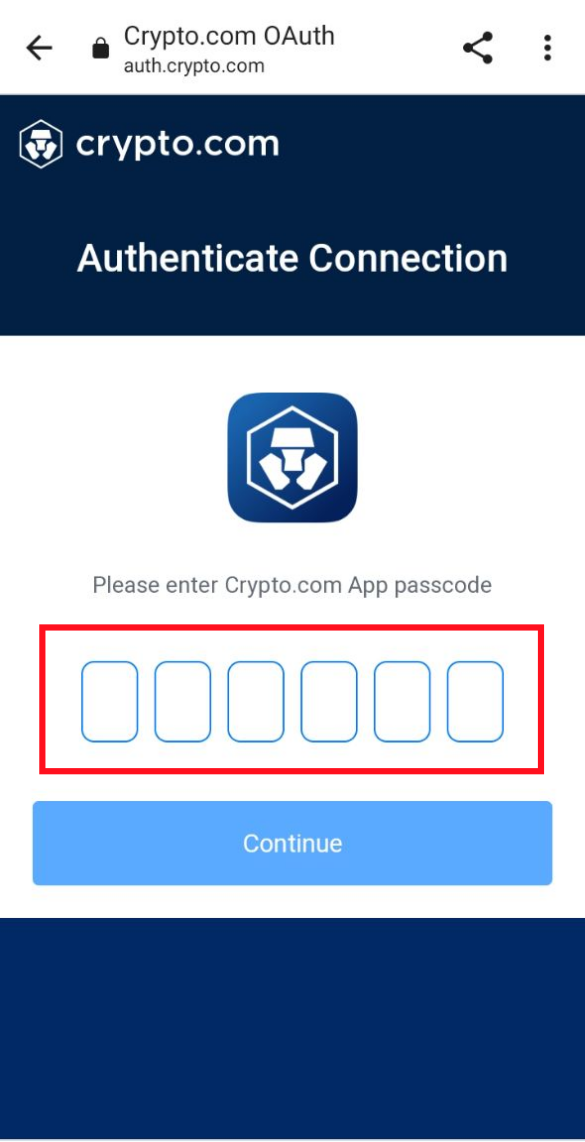
Step 6. Enter Crypto.com App password. And then tap the “Continue” button.
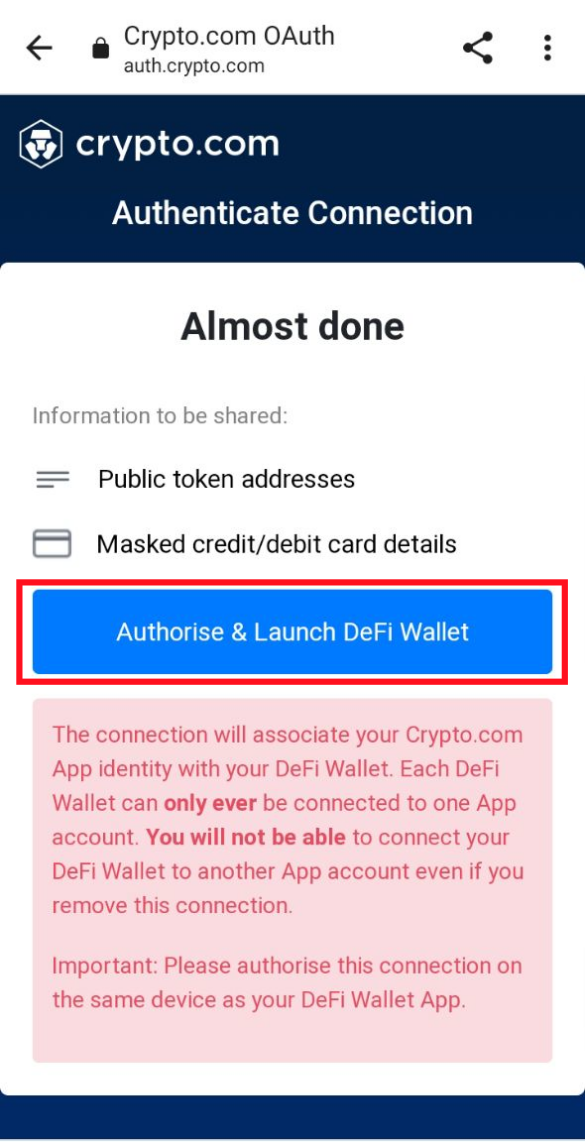
Step 7. Tap the “Authorise & Launch DeFi Wallet” button.
Step 8. Enter a Crypto.com DeFi wallet password.
¶ Funding the CRYPTO.COM DeFi wallet
The Crypto.com DeFi Wallet provides a bridge option onto the CRONOS blockchain. This presents an excellent resource for moving funds from a different blockchain onto the CRONOS blockchain. We will be depositing funds into our DeFi Wallet using another crypto exchange. You will need to deposit CRO (Used in MetaMask for gas fees on CRONOS network) and the USDC token for staking with the staking bot.
Step 1. Open the Crypto.com DeFi Wallet.
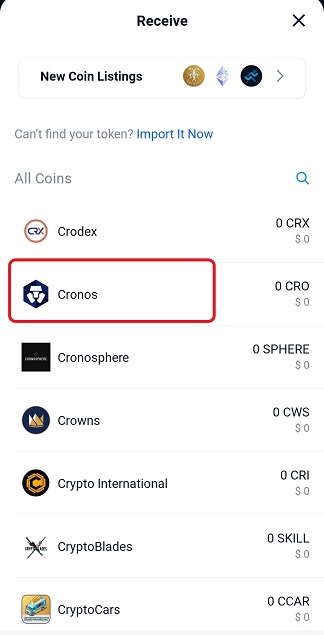
Step 2. Select Receive.
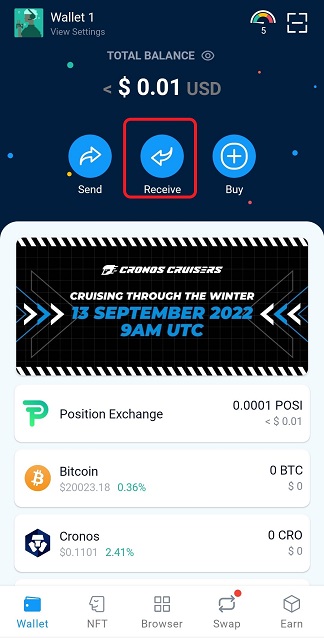
Step 3. Select the crypto currency you want to receive (CRO in our example).
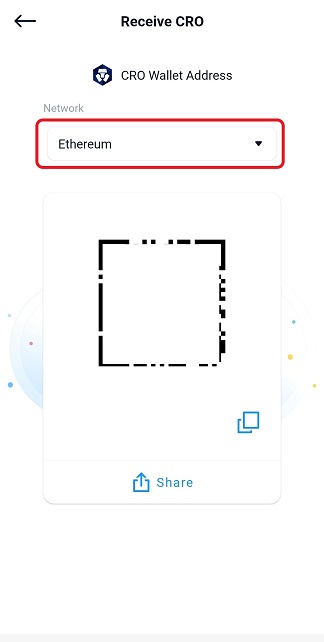
Step 4. Ensure the network is Ethereum and copy the network address
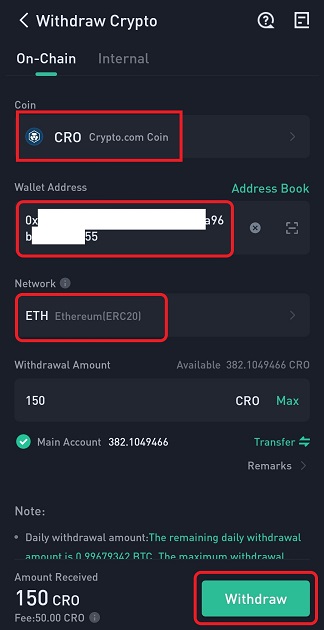
Step 5. From your exchange, ensure you have the Ethereum network selected and the correct wallet address. Then withdraw the funds. (We are using Kucoin in this example).
Note: It may take up to an hour for the funds to arrive in your account.
Perform the above process for CRO and any stable coins you intend to stake.
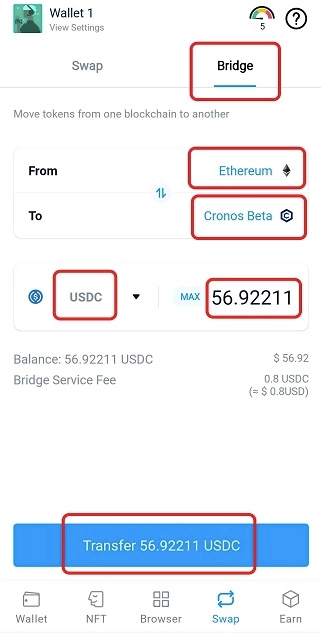
¶ Bridging in the CRYPTO.COM DeFi wallet (only for CRONOS network staking strategies)
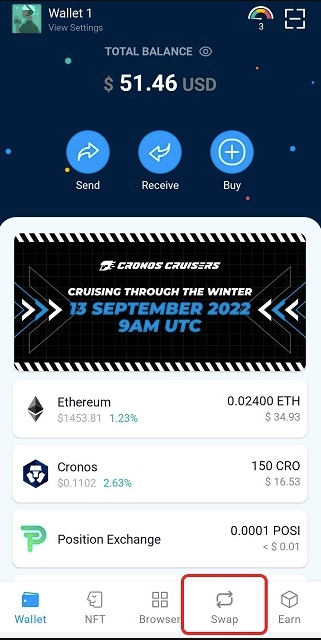
Step 1. Select Swap
Step 2. Select Bridge, choose Ethereum in the From field, Cronos Beta in the To field, select the crypto you want to bridge, the amount, and then select Transfer.
Step 3. Select Confirm to Transfer.
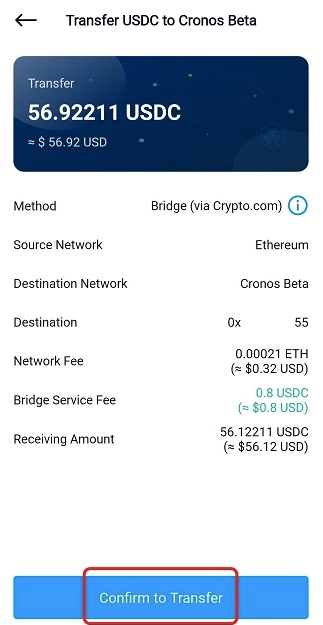
Step 4. Review the confirmation page.
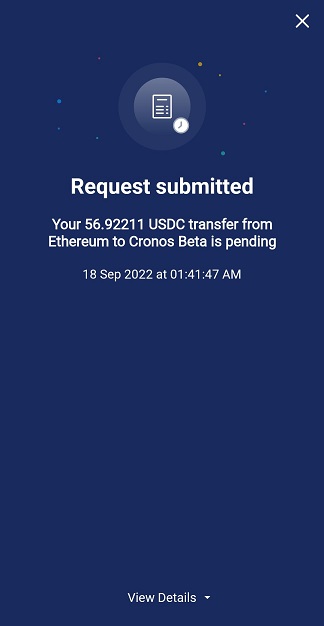
The time it takes to bridge your crypto ranges depending on network speeds and various other factors. Overall, it should take less than an hour to complete.
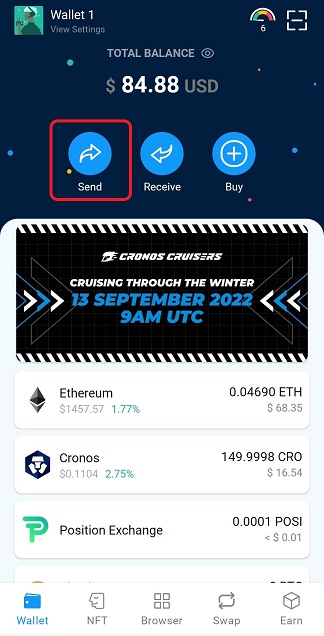
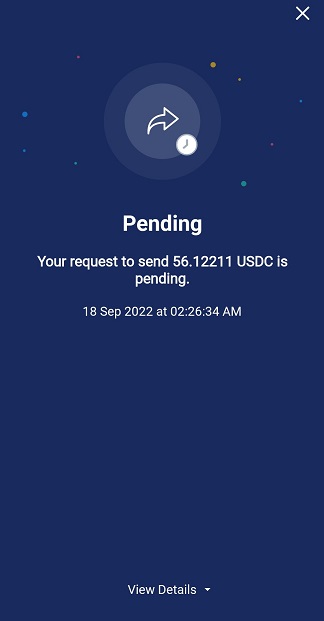
¶ Sending crypto with the CRYPTO.COM DeFi wallet
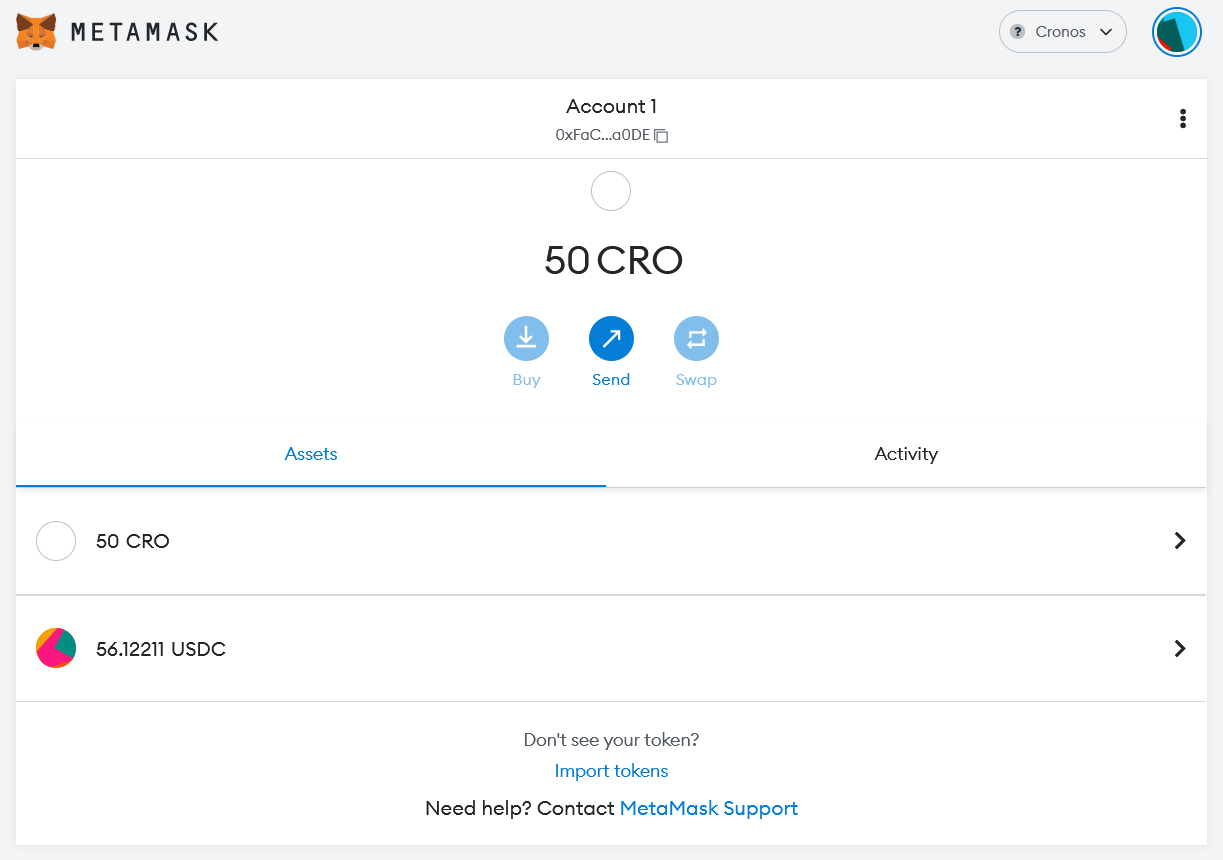
We will be sending USDC and CRO to our MetaMask wallet on the CRONOS blockchain using the DeFi Wallet. Ensure that you do not send all of your CRO first, as you need CRO for gas fees to send other crypto coins.
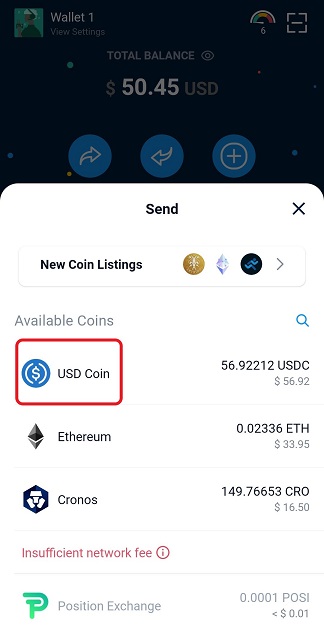
Step 1. Select Send.
Step 2. Select the coin you want to send.
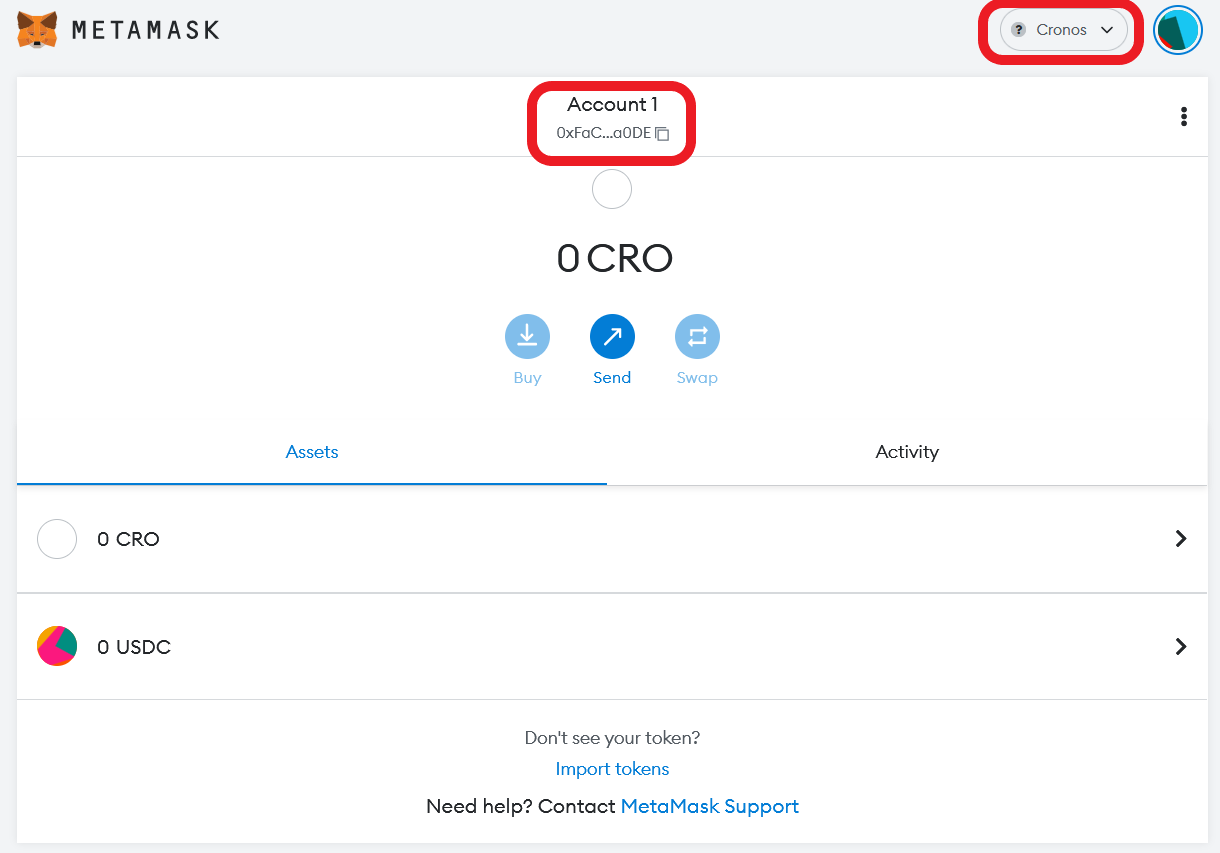
Step 3. Open MetaMask, switch to the Cronos network, and copy your MetaMask wallet address.
Step 4. Select the Cronos Beta network, paste your MetaMask wallet address, and select Next.

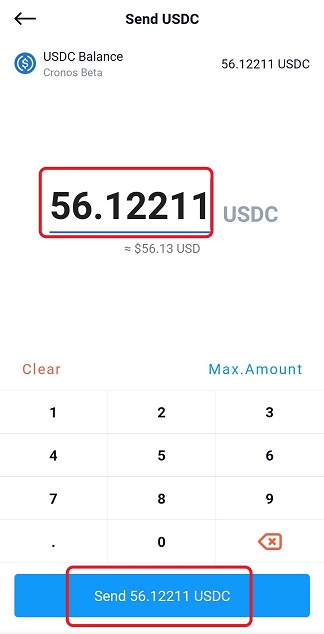
Step 5. Confirm the amount and press Send.
Step 6. Select Confirm to Send.
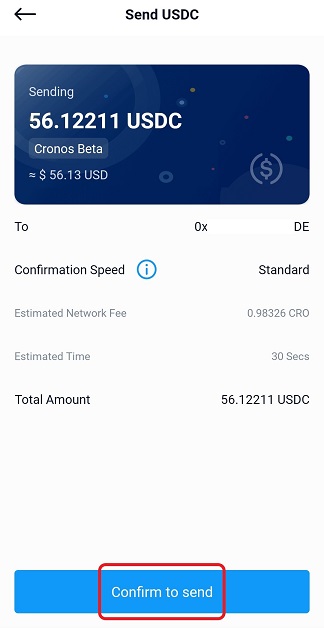
Step 7. Review the confirmation page.
It typically takes less than a minute to see funds in MetaMask.